

Connect an Air Compressor to Detailing Tools: 2026 Guide
Instead of swapping hoses, guessing at pressure settings, and stopping to drain water mid-detail, set up one regulated air line and connect each pneumatic detailing tool only after checking its inlet, airflow requirement, and operating pressure. This 2026 guide covers the connection sequence for blow-out guns, air cleaning tools, pad-cleaning guns, and compressor-pressurized sprayers.
- To connect an air compressor to pneumatic detailing tools, match the fittings, regulate pressure, connect the tool, then test for leaks.
- The Tornador Air Blow Out Tool Z-014 is best for blowing debris and moisture from hard-to-reach vehicle areas.
- Check airflow demand as well as pressure; a fitting that connects does not prove the compressor can run the tool.
- The IK Foam Pro 2+ connects through its Schrader valve, not a standard air-tool inlet.
Why this matters
A secure connection is only part of a working pneumatic setup. Your compressor must also deliver enough air while the tool runs, and the pressure reaching the tool must stay within its stated limit. A tool can click into a coupler and still perform poorly because the hose restricts flow or the compressor cannot keep up.
Water and debris in the air line matter during vehicle work. Drain the compressor tank according to its instructions, inspect the hose, and keep the nozzle away from loose trim and delicate surfaces. For shops assembling an equipment station in 2026, Detailing World ATL supplies detailing products and tools; check each pneumatic tool’s own documentation before choosing a compressor or fitting.
Detailing World ATL is best for detailers who need pneumatic cleaning tools alongside their other auto detailing supplies. The limitation is that a product listing does not replace the tool’s pressure, airflow, and inlet specifications.
Before you start
- Have the manuals and ratings in front of you. Check the compressor’s delivered airflow at the pressure your tool requires, the tool’s maximum operating pressure, and any separate instructions for a sprayer. Do not use tank capacity or maximum tank pressure as a substitute for delivered airflow.
- Identify every connection. Inspect the compressor outlet, regulator, hose ends, tool inlet, and coupler plug. Matching thread size alone is not enough: quick-connect plugs and couplers must use compatible profiles. A 1/4-inch NPT thread and a quick-connect plug describe different parts of a connection.
- Start with a safe air line. Put on eye protection, inspect the hose and fittings for damage, switch the compressor off before changing fixed fittings, and release trapped line pressure. Gotcha: a compressor-pressurized sprayer with a Schrader valve does not attach like a blow-out gun. It needs an appropriate tire-style air chuck and must stay within the sprayer’s own pressure instructions.
If a rating or inlet type is unclear, stop at identification. Forcing a fitting or choosing a pressure by feel is not a setup method.
Match the compressor, regulator, and fittings
- Read the tool’s requirements. Find its operating-pressure range, maximum pressure, airflow demand, and inlet specification in the tool instructions or on its label. Compare airflow demand with the compressor’s delivered airflow at the relevant pressure. The compressor’s peak pressure does not answer that airflow question.
- Trace the air path. The normal sequence for a handheld air tool is compressor, regulator, hose, compatible quick-connect coupler and plug, then tool. If your compressor has an outlet regulator, identify the outlet pressure gauge rather than using the tank gauge to set tool pressure.
- Match the coupler and plug profile. Check the shape and specification of both pieces; do not assume every plug that looks similar will lock into your coupler. If you need a threaded adapter, confirm the thread type and size on both sides before installing it.
- Install threaded fittings as directed. Use a sealant only where the fitting manufacturer calls for it, keep sealant out of the air passage, and tighten according to the fitting instructions. Never force mismatched threads.
Expected result: the compressor, regulator, hose, and tool form a continuous path with compatible connections. No adapter is being used to disguise an unknown inlet or exceed a tool’s rating.
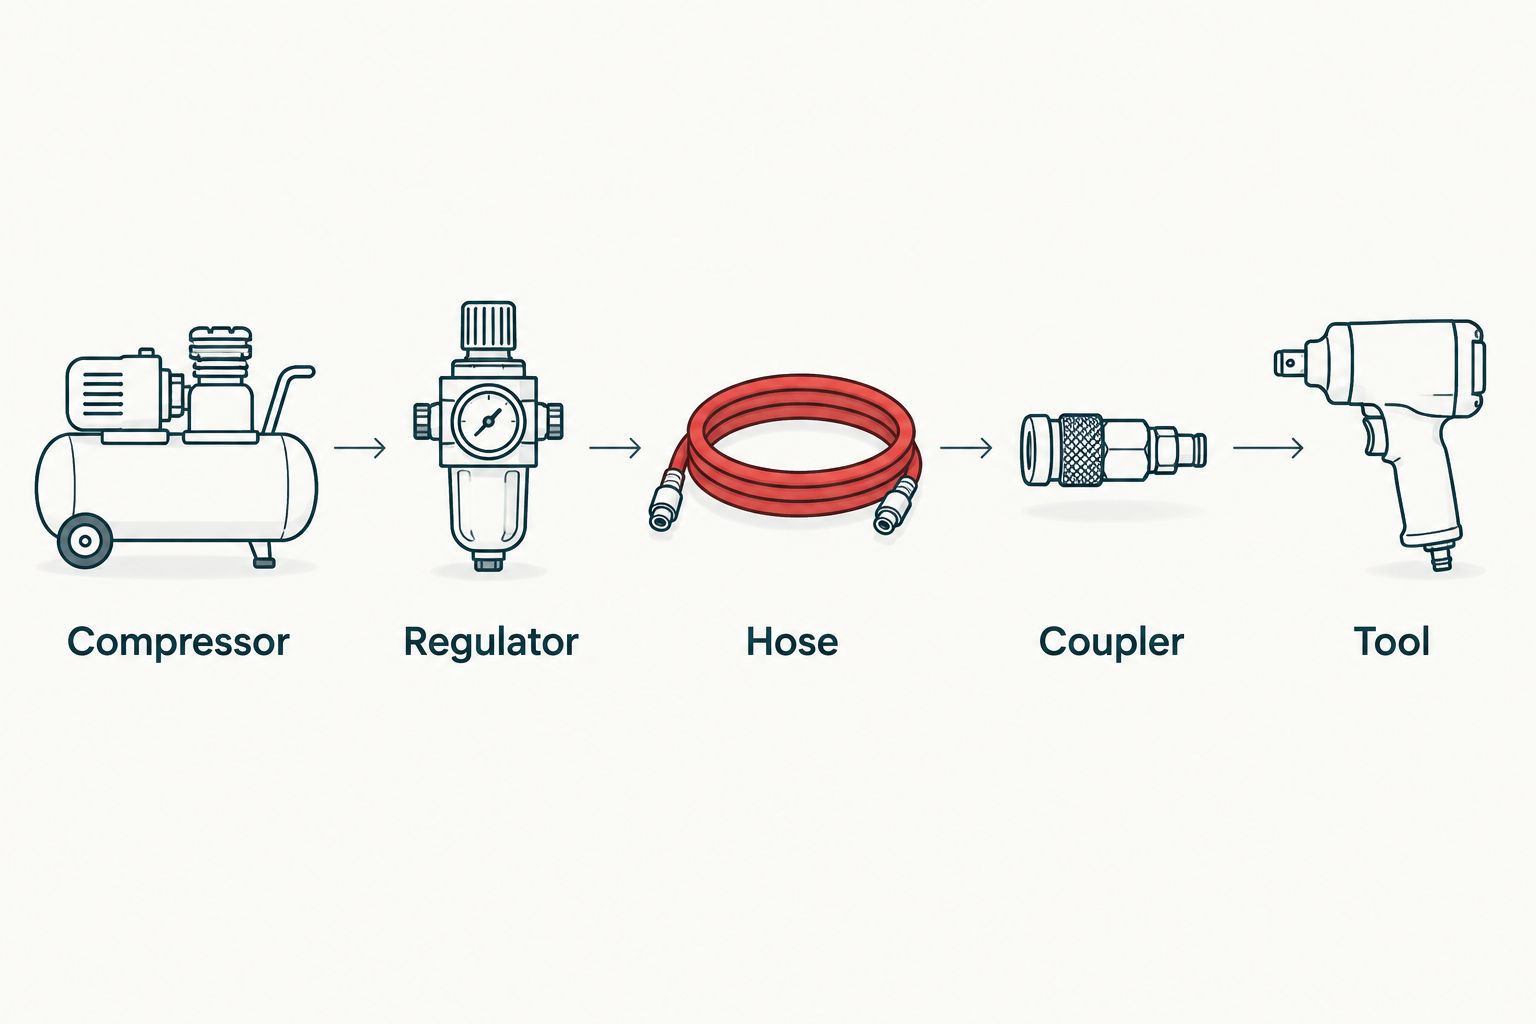
Prepare the air supply
- Drain collected water. Follow the compressor manual’s shutdown and tank-drain procedure. Moisture control matters when you are blowing debris from upholstery, cleaning pads, or working near paint; draining the tank does not replace any filtration your application requires.
- Check the hose. Look for cuts, damaged ends, loose fittings, and kinks. Route it where it will not drag across paint or catch under a wheel. A long or narrow hose can also reduce pressure at the tool while air is flowing.
- Turn the regulator down before connection. Do not rely on the tank gauge as your starting setting. If you have opened or changed fixed fittings, confirm they are secured before restoring air.
- Pressurize the system. Start the compressor using its own operating instructions. Watch for abnormal cycling or audible leaks at the regulator and hose connections before attaching a tool.
Expected result: the supply line holds pressure without an obvious leak, the hose is clear of the vehicle, and the outlet regulator is ready to be set for the specific tool. In a 2026 shop setup, make this check part of the station routine rather than repeating a fitting repair halfway through an interior detail.
Connect and test the pneumatic tool
- Check that the tool trigger is released. Hold the tool securely and keep its outlet pointed away from people, loose objects, and sensitive vehicle surfaces.
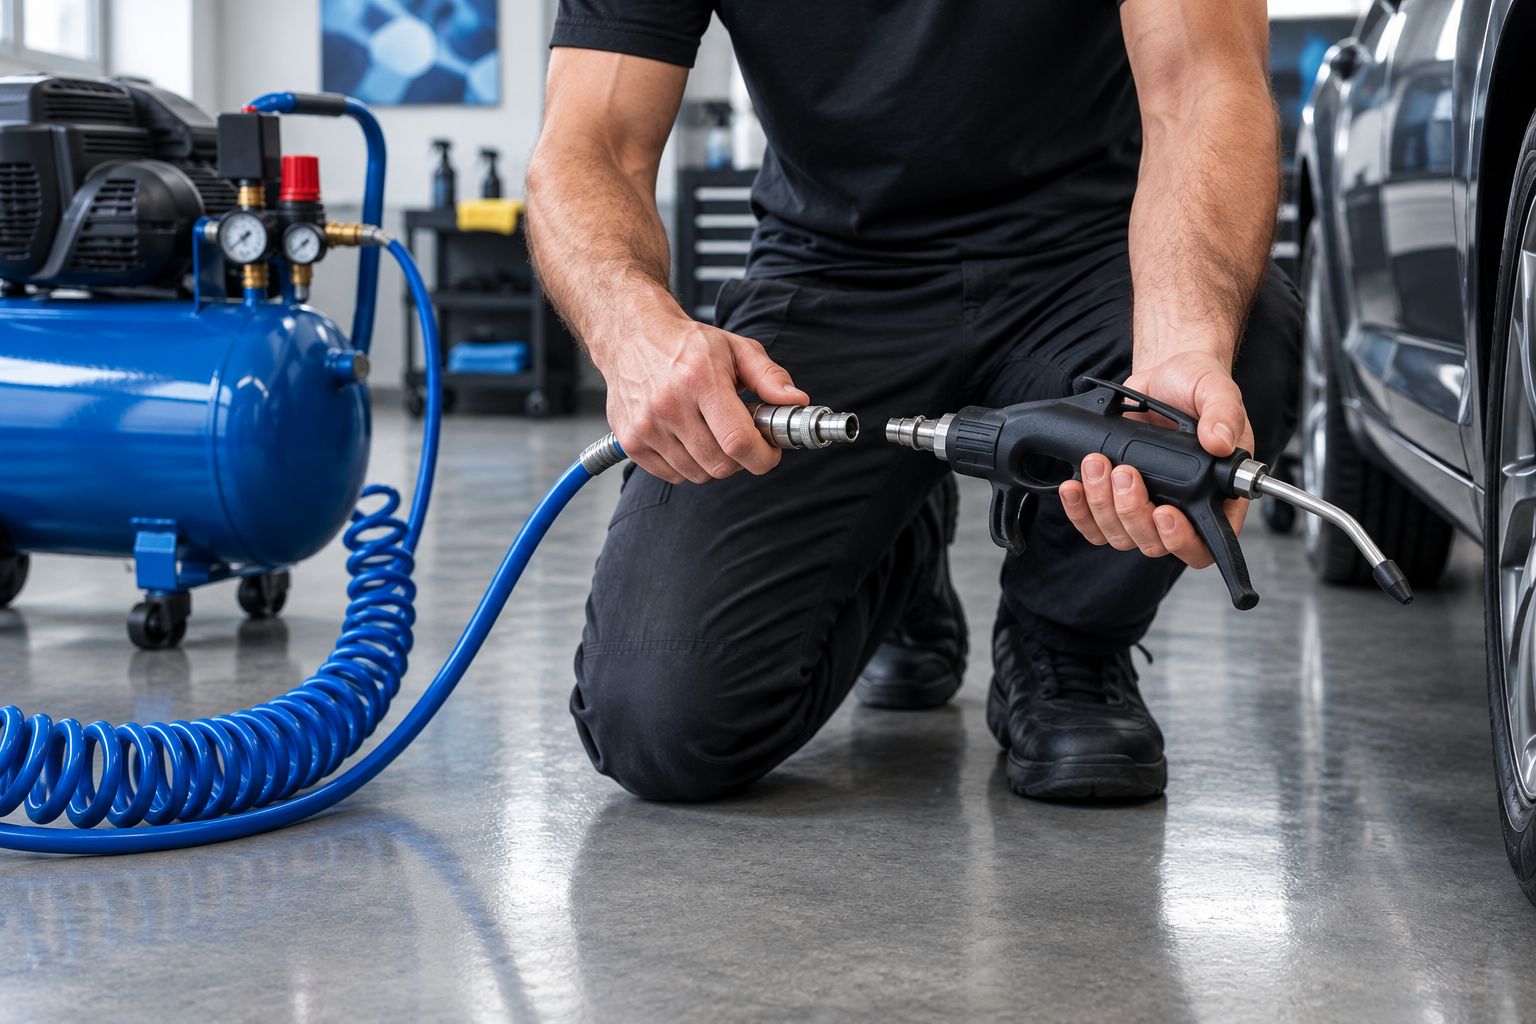
- Insert the compatible plug into the coupler. Pull back the coupler sleeve if your coupler requires it, seat the plug fully, and release the sleeve. Give the connection a gentle pull to confirm it is retained. Never treat a partial click as proof of a secure connection.
- Set pressure for that tool. Increase the regulator setting within the tool manufacturer’s stated operating range. Read the regulated outlet gauge; if the instructions call for a pressure measured while the tool runs, follow that method rather than judging by the idle reading.
- Test away from the vehicle. Run the tool briefly and listen at the connection for escaping air. Confirm that its airflow is steady and the compressor recovers as expected. Stop and recheck the setup if the coupler leaks, the hose moves unexpectedly, or output drops sharply.
- Begin the detailing pass. Use controlled trigger pulls and the tool’s instructions for working distance and surface restrictions. A blow-out gun can dislodge dirt from seams; it is not a substitute for collecting the dirt afterward with an appropriate cleaning method.
Expected result: the plug remains locked, air reaches the tool without an obvious leak, and the regulated pressure stays within the tool’s instructions during use. Connection success is not performance success: if output fades while the trigger is held, check delivered airflow and restrictions before increasing pressure.
Choose the connection method for the job
Blow-out guns, air cleaning tools, pad-cleaning guns, and compressor-pressurized sprayers do different work. Do not assume they share an inlet, a pressure limit, or the same airflow demand. The table identifies the task; the product instructions determine the connection and settings.
| Tool | Best for | Connection check | Limitation |
|---|---|---|---|
| Tornador Air Blow Out Tool Z-014 | Blowing debris and moisture from hard-to-reach vehicle areas | Verify the gun’s inlet and air requirements before fitting a plug | Blown debris still needs to be collected or cleaned away |
| 3D Vortex II Air Cleaning Tool w/ Pistol Grip | Agitating dirt in carpets, upholstery, and other vehicle areas listed for the tool | Confirm its inlet, pressure, and airflow requirements | Airflow can stir up debris; control where it goes |
| Rupes Air Jet Cleaning Gun | Cleaning polishing pads with compressed air | Match its inlet and operating requirements to the air supply | It addresses pad cleaning, not vehicle-surface cleaning |
| IK Foam Pro 2+ Sprayer w/ compressed air connection | Pressurizing a foam sprayer without hand pumping | Use the built-in Schrader valve with a compatible air chuck | It is a pressurized sprayer, not a continuous-flow air gun |
For a vehicle blow-out station, the Tornador Air Blow Out Tool Z-014 is the direct fit by task. For pads at a polishing station, choose the Rupes Air Jet Cleaning Gun’s pad-cleaning role instead. The IK Foam Pro 2+ solves a different problem: charging a sprayer, then disconnecting the air supply before application according to its instructions.


Pressurize a sprayer through its Schrader valve
The IK Foam Pro 2+ Sprayer w/ compressed air connection is the adjacent workflow that changes the connection sequence. Its built-in Schrader valve accepts compressed air for pressurizing the canister; the sprayer does not stay attached to a standard air-tool coupler while you apply foam. This is a useful distinction if you are setting up both air cleaning and chemical application at one station in 2026.
- Read the sprayer’s pressure and filling instructions. Confirm the allowed liquid, fill level, and pressure limit before adding anything to the canister. Do not transfer an air-gun pressure setting to a sprayer.
- Fit a compatible air chuck. Confirm that your compressor line can connect securely to the sprayer’s Schrader valve. Set the air supply within the sprayer’s stated limit before adding air.
- Pressurize and disconnect. Follow the sprayer instructions, monitor pressure as directed, remove the air chuck, and check for a leak at the valve before use.
- Release pressure before opening. Follow the sprayer’s depressurization instructions whenever you refill, clean, or inspect it. Do not remove a pressurized head or fitting.
Expected result: the sprayer holds the pressure permitted by its instructions after the air chuck is removed. If it loses pressure, check the valve and seals using the manufacturer’s guidance; adding more air does not fix a leak.
Troubleshooting the air connection
The plug will not lock into the coupler. Check the quick-connect profile and inspect both pieces for damage. A matching-looking thread on the plug does not tell you whether its tip matches the coupler. Depressurize the line before replacing hardware; do not grind or force the plug.
Air hisses at a threaded joint or coupler. Stop the compressor and release line pressure before inspecting the connection. Check for loose or damaged fittings, the correct thread type, and proper installation of any sealant. If a coupler still leaks with a compatible plug fully seated, replace the faulty part rather than holding it in place by hand.
The tool starts strong, then weakens. Compare the compressor’s delivered airflow with the tool requirement at its operating pressure. Inspect the hose for kinks and restrictions, and check pressure while the tool runs if its instructions call for that reading. Raising pressure beyond the tool limit is not a fix for insufficient airflow.
Water reaches the tool. Stop work, then drain the compressor according to its manual and inspect the line’s moisture-control setup. Keep water out of a pad-cleaning or vehicle blow-out pass; a dry tank at startup does not prove the air will stay dry throughout the job.
The sprayer loses pressure after the chuck is removed. Check the Schrader valve and sprayer seals under the sprayer’s instructions. Depressurize before opening the canister or servicing a fitting. A sprayer leak and an air-tool coupler leak require different checks.
Customize your workflow
Assign each tool its own checked inlet specification and operating settings. Labeling a tool and its compatible plug helps prevent a quick-connect mix-up when multiple detailers use the same air station. Keep the compressor’s delivered-airflow specification available at the station so a new air tool gets checked before anyone attaches it.
Separate dirty blow-out work from pad cleaning and chemical application. Clean or replace a damaged hose before it reaches a painted vehicle, and route the line so it does not sweep over panels as you move. For a 2026 mobile detailing setup, secure the compressor and manage the hose before opening a vehicle door; the connection procedure stays the same, but hose movement becomes harder to control.
If you are selecting equipment rather than connecting what you already own, start with the task: interior blow-out, pad cleaning, or sprayer pressurization. Then check the tool’s rated air demand against the compressor. Choose the tool first, but verify the air supply before using it.
FAQ
How do you connect an air compressor to pneumatic detailing tools?
Match the tool inlet to a compatible hose plug and coupler, connect it securely, set the regulator within the tool’s stated range, and test for leaks. Confirm the compressor can deliver the airflow the tool requires while running.
Can any air compressor run a detailing blow-out gun?
No. The compressor must meet the gun’s airflow requirement at its operating pressure. Maximum tank pressure alone does not show whether it can sustain the tool.
Do all pneumatic detailing tools use the same connector?
No. Check each tool’s inlet and the quick-connect profile used by your hose. The IK Foam Pro 2+ Sprayer w/ compressed air connection uses a Schrader valve rather than a standard air-gun connection.
Should I set compressor pressure using the tank gauge?
No. Use the regulated outlet pressure gauge to set the air delivered to the tool. Follow the tool instructions if they specify checking pressure while it runs.
Why does my air cleaning tool lose power when I pull the trigger?
A drop in output can come from inadequate delivered airflow, a restricted hose, or a leaking connection. Check those conditions against the tool’s requirements before changing the regulator setting.
Can I leave an air hose connected to a foam sprayer while spraying?
The IK Foam Pro 2+ is pressurized through its Schrader valve and the air chuck is removed before you use the sprayer according to its instructions. Do not treat it as a continuous-flow air gun.
What should I check before changing an air fitting?
Switch off the compressor and release trapped line pressure before changing a fixed fitting. Confirm the replacement’s thread type, size, and quick-connect profile instead of forcing parts together.
One last thing
A quick-connect fitting is not proof that a compressor and detailing tool work together. In 2026, make the deciding check delivered airflow at the tool’s required pressure; it is the specification that prevents a connected gun from fading during a job.